Pages

Showing posts with label Upcycle Recycle ReUse. Show all posts

September 4, 2018

diy: build your own light box


I have needed a photo light box for quite some time now. Actually, much too long especially now as I am taking my work more serious, and since it has been raining almost non-stop lately here in Florida, well, that has now forced me into full buy it or make it mode! So let me explain...

I have been using my backyard as my photography studio so I can optimize the most perfect lighting that I have available to me at this time. My indoor space & studio just does not have ample enough natural light or the space to maneuver it. Of course, even outdoors, the perfect lighting window of time is very limited each day and even more-so when it's raining. 

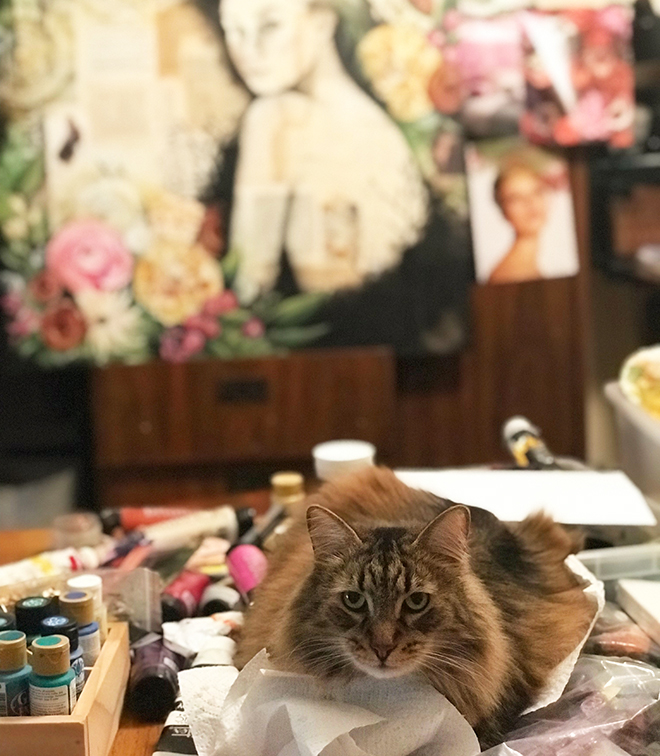
So, I usually drag a table or stool outside to the backyard during that golden hour for photography and take several trips back and forth to collect all the supplies and art I will need for my little photoshoot set-up. I will admit it can get pretty challenging and even comical, at times. Such as when my back was turned and the neighbor's cat decided to jump onto my display bringing everything crashing down into the grass, or when a gust of wind decided to explode into the yard unannounced and scatter small pieces of art everywhere, or recently when it's sunny one minute and the next I am screaming at the top of my lungs in full panic-mode for the kids to come out and help "save the artwork" as rain comes pouring down. Welcome to Florida.

So, yeah, it's time for a light box!!

Anyone who knows me also knows that if it's an option, I will most often make it rather than buy it. There are a lot of tutorials out there for building one of these using everything from a cardboard box to pvc piping. The important thing for me was function, storage, durability and if possible, I wanted to use what I had on hand! 

My motto is and always will be
UPCYCLE - RECYCLE - REUSE

As I searched throughout my studio and garage, I knew a cardboard box just wasn't going to be sustainable for me. I wanted something that would LAST and would be easy to store away, too!

The one thing I do have available as an artist is tons and tons of student-grade, back-stapled canvases that I use to teach with or try out new techniques and so on, and I realized the wood frames would work perfectly! If you don't have these just laying around like I do, you can get these at your local craft store for just a few dollars. They are generally very inexpensive.

So let's get started....

YOU WILL NEED:
Three 16"x20" Student-Grade, Back-Stapled, Stretched Artist Canvas (used or new)
...you can use larger sized canvas also (I do believe that will be in my future, too)
Foam Core/Board
Poster Board, White (choose according to what you will be photographing)
15" or larger Parchment Paper
Two 8.5" or larger Utility Clamp Work Lights with Aluminum Reflector
Two Natural Daylight CFL Bulb's (Compact Fluorescent Light not LED)
4 Large Binder Clips
Duck Tape
Clear Package Tape or glue
Utility Knife, Scissors
Pliers
Sandpaper

First you will need to strip the canvas material off the wood frames using a utility knife. You can remove the staples that remain on the backside and sand the wood lightly.
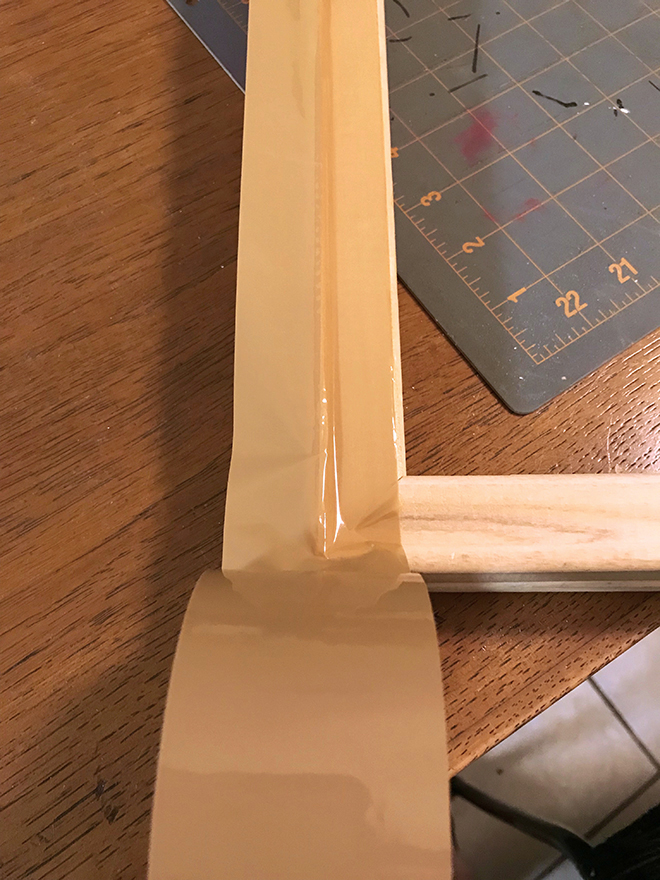


Now it is time for construction. I thought I had some hinges in my toolbox and would have preferred that, but just couldn't find them, so duck tape was used instead. Laying two frames side by side joined at the 16" side, tape them together. Then 'fold' them into each other, like a book, taping the backside of the fold. Remember you want each side to fold inward eventually like a box, so make certain you are not taping both sides flat. Then, tape the remaining frame to one of the 16" sides.


The openings now need to be covered with a white material that will help diffuse the light coming from the lamps onto the item being photographed. There are a lot of options out there suggesting what to use, such as tissue paper and even old bedsheets. I decided parchment paper was my best option, I had it on hand, and it would have a bit more durability in the end. Cut three pieces that cover the openings of the frame and then glue or tape them down. I used clear packing tape.


We're almost there! Just a few more steps to go.....

Next you will need to cut a piece of foam core/board the size of the squared opening that remains at the top once it's set up (19.5"x20" for mine) and using 4 large binder clips, 2 at the back, and one at each front corner, you can sit the foam on top of one of the handles of each clip. There is also an option of creating a wood plank for the top with a cut-out circle in the middle so you can take photos from above, but I will show that construction at a later time.

The construction is basically done at this point, except for the lights and the backdrop.

LIGHTING

The lighting I use are a pair of 8.5" utility clamp work lights with aluminum reflector (you can find these for under $10 almost anywhere) and most important, the bulbs should be a Natural Daylight CFL - compact fluorescent light (not LED). I clamp my lights onto a couple blocks of wood I had laying around.


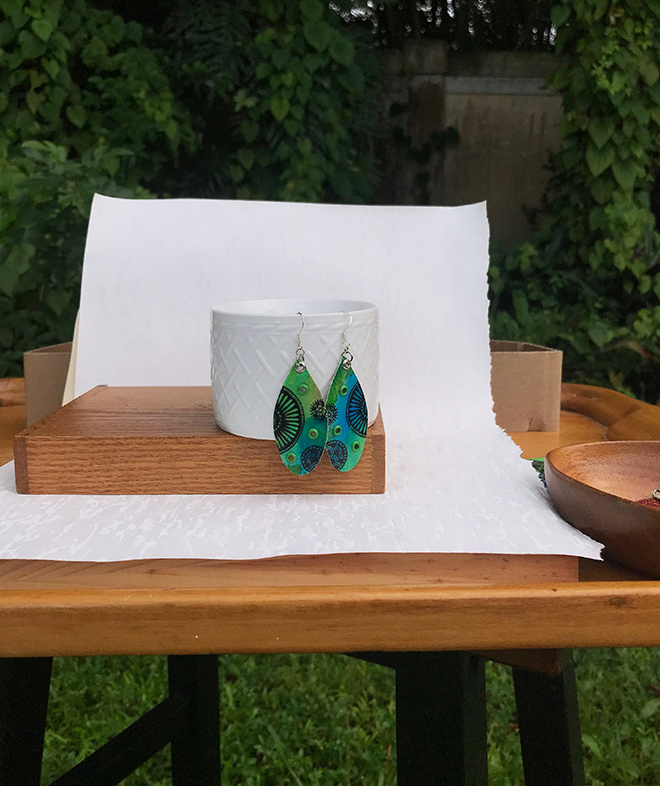
INFINITY CURVE BACKDROP

There are a lot of different options for the backdrop. Generally, I prefer an infinity curve backdrop so I get an ultra-smooth background with no corners or angles and since it doesn't have any corners, shadows won't gather in the background.

An easy and inexpensive option for this sized light box is poster board and it comes in a wide range of colors and prints. I love the faux wood planks poster board I found and can't wait to use it. Hang your backdrop from the 2 binder clips in the back, letting it curve down so it lays on top of the table and you are ready to photograph your product!!


August 29, 2018

insects and botanicals

My studio is filled to the brim with years of collecting surface substrates in every imaginable material and size just waiting for its due transformation! Many times I have found these fantastic 'canvases' in the bottoms of bins, at garage sales, on the side of the road, or end of season sales and often they aren't even intended to be used as a canvas at all. My family and friends can attest to this crazy obsession of mine, and although they don't always see my vision at the time, once I do my thing I usually get the thumbs up. 

When I found these smaller blocks of wood at an end of season sale, they had little mass-produced messages printed on them....but I LOVED the wood. The wood was real. The color of the wood was a-ma-zing! And let's just say they were marked way, way. way down!! Ultimately, they came home with me, the messages were sanded off, and there they sat waiting their turn for transformation.

Late the other night I decided to grab one and just try something a little different. I really didn't want to add color this time and kept the palette black and white to allow the wood grains and tones to dominate. 

I honestly didn't have a plan in place (which is more often than not the case in my creative world) but once I began, it came together perfectly. I love, love, love how the ink and paint stained the wood, and once the illustration was designed it gave it a bit of a retro-grunge feel. So....very....cool!

I can't wait to do another! and another!! 

Looks like a new series has now been birthed for these remaining blocks of wood: Insects and Botanicals. Stay tuned for more!

July 20, 2018

the story of chromosome X

So very much can happen in a months' time! And how amazing it can be!

'The Story of Chromosome X'  36x36 | Vintage Ephemera, Graphite, Acrylic, Ink, Colored Pencils, Pastels, Gold Leaf

Unexpectedly, and a bit last minute, I decided to submit a painting to Sidney & Berne Davis Art Center's 10th Annual juried exhibition "X". SBDAC invited the artists to interpret the symbol X to honor their 10th anniversary season for the month of June.

Once committed, I still had to figure out my interpretation of the symbol X.

I stared at my blank canvas for a couple weeks waiting for it to speak to me. Nothing. Then more nothing. It continued to stare at me and still nothing. I only knew my daughter would be the subject. But how on earth does that interpret the symbol X?

And then...one day, out of the blue, like an explosion or the excitement of Christmas morning, Chromosome X was born! Of course I had to double check and look up Chromosome X and Chromosome Y to 'just make sure which was which'......just in case I didn't pay close enough attention in Middle School Biology. LOL. Whew! It was all good! I was on the right track.

....and so it began. I didn't know anything at that point other than using my beautiful daughter as my muse and using an element of all the techniques and mediums I am forever drawn to.


The painting was essentially intuitive. I had no real plan. No sketches. No idea. I didn't see the final piece in my head. I let the painting tell me the story. The Story of Chromosome X. The beginning when God created woman. The love songs. The definition. The beauty of a woman.

I loved every part of this painting adventure including receiving the Sidney & Berne Davis Art Center's Choice Award! Such an honor! And surprise! I overheard and was told such amazing compliments and "WOW's" from the Center and the public and fellow artists. I am honored.

It filled my heart & soul and affirmed once again, the path I am on as an artist!!

Sidney & Berne Davis Art Center 10th Annual Juried Exhibition 'X' Choice Award 2018

July 17, 2014

the plans God has for me...


"For I know the plans I have for you," declares the LORD, "plans to prosper you and not to harm you, plans to give you hope and a future." Jeremiah 29:11


Vintage Bible Page, Pen & Ink, Prismacolor Colored Pencils (approx 5"x7.5")
- Sold -
 It is amazing how your life can change so quickly. So unexpected. The last several years have been such a long road of twists and turns for me, my family, my career, my art...and then out of the blue, or so it seems, it all changes. Something that changes your entire professional future which in turn changes all the rest! This road has felt bumpy and unpaved just too many times. A road that truly didn't feel like it was leading anywhere...and then you turn a corner and you stand before an amazing field of fantastic! and everywhere I turn is filled with even more fantastic! But God already knew. He knew the plans He had for me. He had already prepared this road for my life long before I even knew the road existed.

One more reminder in my life to TRUST HIM!!!

July 1, 2014

let the children come


 Jesus said, "Let the little children come to me, and do not hinder them, for the kingdom of heaven belongs to such as these." Matthew 19:14


Vintage Bible Page, Pen & Ink, Prismacolor Colored Pencils (approx 5"x7.5")
A recent commissioned piece. I really love the way the words peak through the leaves and flowers. I have numerous other pages and will be posting those very soon.

May 6, 2014

God's bounty in nature


Such an abundance of beauty we are all surrounded by....our glorious Nature! A gift given to us by God. To love. To appreciate. To take care of.   "The Lord God took the man and put him in the Garden of Eden to work it and take care of it" Genesis 2:15

Almost daily, when I am sitting in my studio, I can look out of my window and watch the numerous birds frolicking within the trees and grass, singing songs that I am certain are meant for me only. What a blessing to have these beautiful birds...bluebirds, cardinals, finches, woodpeckers and more...stop by to visit my back yard. Meanwhile, gorgeous butterflies and dragonflies fill the air. How can you not be inspired by it all?


Vintage Bible Page, Pen & Ink, Prismacolor Colored Pencils (approx 5"x7.5")

May 1, 2014

violets and forgiveness


“Forgiveness is the fragrance that the violet sheds on the heel that has crushed it.” - Mark Twain
When I saw the 3 words 'bunch of violets' under the poem, I knew violets were to be the creative design behind this page.


Vintage book page "The Last Days of Pompeii", pen & ink, Prismacolor pencils (approx 4.75"x7.25")

April 30, 2014

your path in life...


“Do you choose the path, or the path choose you?” Hmmmm....something to ponder. Do we really want to change anything from the path of our life?? We always say we would have changed this or that, go this way or that way, choose something different...but in knowing that, everything...everything would be different as we know it now. No thanks. Wouldn't change a thing!

Vintage book page, pen & ink, Prismacolor pencils (approx 4.75"x7.25")

April 29, 2014

some days need serious color!


Some days, your leaves (or your life) needs some serious color! I have had a few of those days for sure, as I am sure many do. Color is so powerful. One color alone, or specific color combination, can create mood or stir emotion, recall a memory, it can even change your heart rate. Truly amazing!

Some days I feel like I need ALL the colors! As many as possible. I love them all. I want them all. xo


Vintage Book Page, Pen & Ink, Prismacolor Colored Pencils (approx 4.75"x7.25")

April 28, 2014

the Lord is my rock!


The Lord is my Rock....and Thank God that He is!! Everyday my relationship with the Lord grows and in that, I grow as well. As a mother, a friend, an artist, a person. I have learned patience, forgiveness, compassion, faith and so, so much more. I am Blessed.

"The Lord is my rock, and my fortress, and my deliverer, my God, my rock, in whom I take refuge..." Psalms18:2

Vintage Bible Page, Pen & Ink, Prismacolor Colored Pencils (approx 5"x7.5")

I have been creating artwork on vintage book pages for a very long time now and have recently been adding to the collection, almost daily. I have always been in love with old or vintage books and papers and years ago when I came upon a few vintage books that were falling apart with missing pages, I knew I was going to bring them back to life using my artwork. Using vintage book pages is nothing new in the art world these days, but you will often find them used with something printed on top of them, versus an original piece of artwork. I didn't want to do that. I wanted to create something that was unique, original, beautiful, accessible, and affordable. On the creating end, I could take a limited amount of supplies with me (like I often do with ACEO's) so I could work on them almost anywhere. Working on the Bible pages have especially been rewarding for me lately, allowing me to spend even more time in the Word. It's a win-win!
Blessings to you!

July 3, 2013

wearable art shoulder bags galore!

Bags, bags and more bags. Here are some more!
A

'Spotted Floral' OOAK Handpainted & Embellished Artsy Shoulder Bag

SOLD


A

'Vintage Floral' OOAK Embellished Artsy Shoulder Bag

SOLD


A

'Sea Treasure' OOAK Handpainted & Embellished Artsy Shoulder Bag

SOLD

Related Posts Plugin for WordPress, Blogger...